

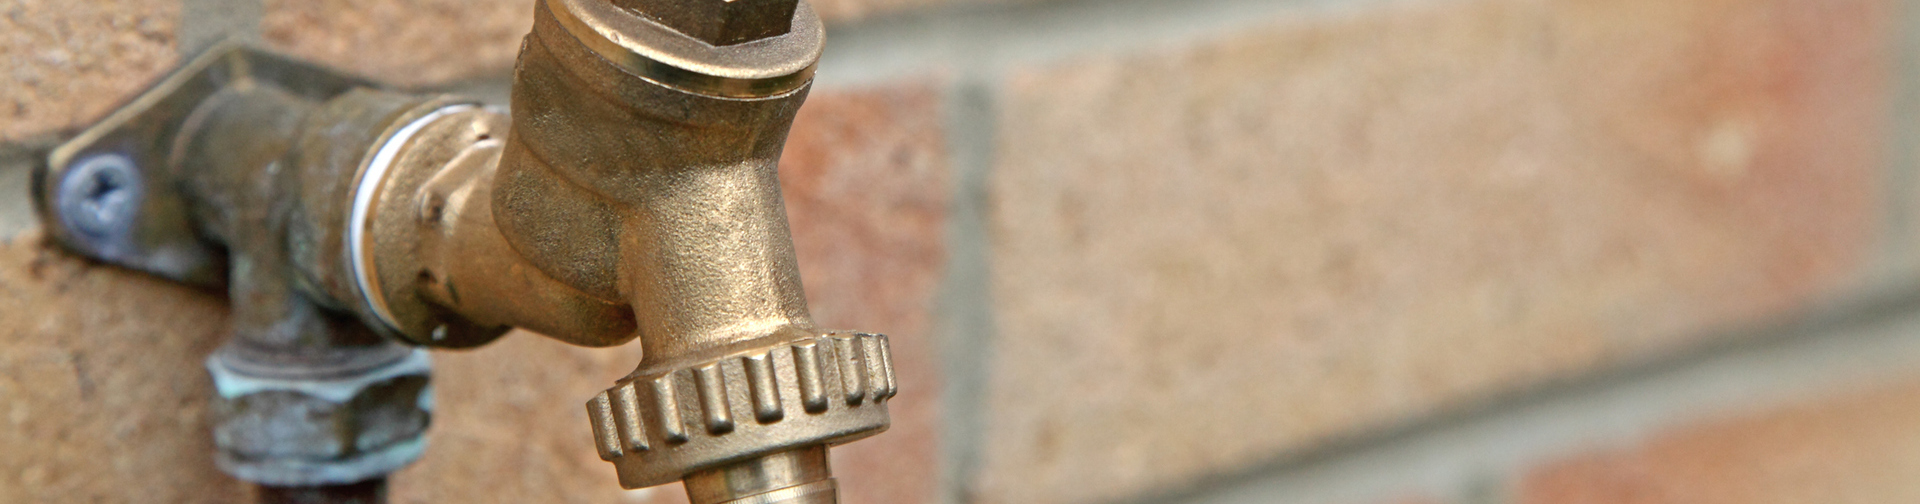
How To Stop An Outside Tap From Leaking
Posted on 21st September 2023 at 16:04
A leaking outside tap can quickly lead to skyrocketing water bills. While that dripping water could serve a purpose when nourishing your plants or lawn, it's quite another story when it's seeping onto your concrete pathway. In essence, it's like channelling your money down the drain. In more severe cases, if the faucet is leaking significantly, it can result in a waterlogged garden. Read on and follow our simple step-by-step DIY guide to stopping your outside tap from leaking for good.
Why is my outside tap leaking?
It's often attributed to one of two common wear and tear issues: a loosened packing nut or a worn washer. Much like most taps, an outside tap contains an internal washer responsible for sealing and completely stopping the water flow when the tap is turned off. Repeatedly turning the tap on and off over time can cause the washer to deteriorate significantly. Eventually, it can wear away to the point where it fails to create a proper seal, resulting in water leakage and a continuous drip from the outside tap. This is a common problem associated with aging or heavily used outdoor taps.
To address this issue, it's usually necessary to replace the worn washer. This is a relatively simple and cost-effective fix that can prevent water wastage and ensure the proper functioning of your outside tap. Additionally, checking and tightening the packing nut can help maintain a secure fit and prevent further leaks. Regular maintenance and timely resolution of such minor plumbing problems can save you from more extensive repairs and higher water bills in the long term.

How easy is it to fix my leaking outside tap?
As DIY projects go, it’s a fairly straightforward one. And changing a washer on an outside tap is around 4-5 times cheaper than replacing it with a brand new tap.
You only need a few tools and luckily washers are reassuringly cheap and easy to come by. The trickiest bit of the repair will probably be how to unscrew the top of the tap – but hold on and we’ll show you how that’s done. Keep in mind that if the tap is old or damaged, it may be better to fit a new one.
How to stop your outside tap dripping
There’s nothing more annoying than being in the middle of a DIY job and then having to go and buy a tool or part to finish it. So before you tackle this dripping outside tap, make sure you’ve got everything you need.
What tools do you need to fix a leaking outside tap?
New washer (if you don’t know what size you need, you could open up the tap, grab the old one and take it to the DIY shop for a replacement, or just buy a bag of assorted washers ahead of time)
Adjustable spanner
Flat-head screwdriver
Plumber’s (PTFE) tape

Step 1: Identify the Exact Location of the Leak
Outdoor taps commonly develop leaks in one of two places: either at the spout itself or around the spindle or shaft where it enters the packing nut or gland nut. Knowing where the leak is coming from will help you determine the necessary steps for repair.

Step 2: Turn Off Your Mains Water Supply at the Stopcock
Before you begin any repair work, locate your mains water stopcock (usually found under the kitchen sink) and turn it off. Afterward, open the tap to let any remaining water flow out, preventing it from spraying on your face.
Top Tip: If your internal stopcock hasn't been used for a while and starts to leak when you turn off the tap, use an adjustable spanner to tighten the packing nut of the stopcock, as shown in Step 3a.

Step 3a: If the Tap Is Leaking at the Spindle/Handle
If the leak is occurring around the spindle or handle of the tap, skip to the next part of the guide if the leak is at the spout. Use an adjustable spanner to tighten the packing nut, which is located just below the spindle. Over time, packing nuts can become loose due to water pressure, and tightening it often resolves the issue.
Top Tip: If the tap continues to leak from the packing nut, try loosening the packing nut, applying PTFE (plumber's tape) to the thread, and then tightening it up again.
If the tap no longer leaks when you turn the water supply back on, your repair is complete.
Step 3b: If the Tap Is Leaking from the Spout
If the tap is leaking from the spout, the problem is most likely a worn or damaged washer inside the tap. Follow the remaining steps of the guide to learn how to remove and replace the washer.

Step 4: Remove the Valve Head
The valve head is located below the packing nut and can be identified as the larger hexagon nut at the base of the tap handle. Using an adjustable spanner, unscrew this larger nut until the tap head comes away.

Step 5: Remove the Old Washer
Once the valve head is removed, you'll see the old washer at the end of the tap valve. Carefully use a flathead screwdriver to remove the old washer.

Step 6: Clean the Washer Seat
Using an old toothbrush, thoroughly clean any debris or dirt from the washer seat.

Step 7: Replace with a New Washer
Insert the new washer and wind PTFE or plumber's tape around the threads of the tap. Then, reassemble the valve by putting it back in place.

Step 8: Tighten Everything and Turn the Mains Water Supply Back On
Using your adjustable spanner, reverse the steps by tightening everything up. Finally, return to your stopcock and turn the mains water supply back on. If the leak has been resolved, you've successfully completed the repair.
If the tap is still leaking…
If your outside tap is still dripping, it could be an issue with the valve seat of the tap. This is the bit of the tap inside that the washer pushes against to make a seal and cut off the flow of water. At this stage, you could re-grind the seat flat with a valve reseating tool – or just buy a new tap as they’re not nearly as expensive as those swanky chrome-plated taps indoors. If you’re not a confident DIYer do not fret, we are here to help! Stop here and get in touch with us. We can send out a professional to help you and the issue will be solved in no time thanks to our trusted trained plumbers.

If your hose connection is leaking
If it’s your hose connector that’s leaking, it’s most likely the O-ring in the coupler – just like the washer in the tap, it gets worn over time. Here’s how you can stop the drip from your hose connection:
Remove the old O-ring with a screwdriver.
Get a new replacement O-ring, ideally fully matching the old one, although a slightly thicker or smaller diameter O-ring may still be okay.
Push the new O-ring into the groove and make sure it’s fully seated in place.
Are outside taps different to inside taps?
Outside taps are quite similar to their indoor counterparts, with some notable differences. In modern outside taps, you'll typically find a double-check valve designed to ensure that water flows out of the tap and doesn't flow back into the system. This feature helps prevent contamination from external sources from entering your plumbing system.
Additionally, your outside tap might have a distinct spout design compared to indoor taps. It often includes a threaded end, allowing you to attach various accessories like a garden hose, sprinkler, or other outdoor equipment. This threading provides flexibility and convenience for outdoor water use, such as gardening, car washing, or filling a pool.
How do you fix a leaking outside tap
This is a relatively straightforward repair that can be tackled by DIY enthusiasts. Typically, it involves either tightening the packing nut using an adjustable spanner or replacing a worn washer inside the tap.
How do you change the washer on a outside tap?
To fix the issue, start by turning off the mains water supply. Then, remove the valve head and replace the worn washer with a new one that matches the old one in size and type. Finally, reverse the steps to reassemble the tap and restore the mains water supply.
Why does my garden hose leak at the connection?
You probably have a worn O-ring inside the connector. Replace it like for like and you should be good to hook up the hose again.
Struggling to fix the outside tap?
At Swiftfix Solutions, we understand that plumbing issues can sometimes be more complex than they appear. If you're facing a plumbing problem that requires expertise and assurance, don't hesitate to reach out to our team of experienced and fully insured plumbers. We're here to provide you with the professional assistance you need to tackle any plumbing challenge. Please feel free to contact us for reliable and efficient plumbing solutions.
Share this post: